Creating Holiday Programmes
To set up programmes that run during holiday time follow the below steps
Go to Tools > Programme Library
Select Holiday Programmes tab.
Create Sessions & Fees
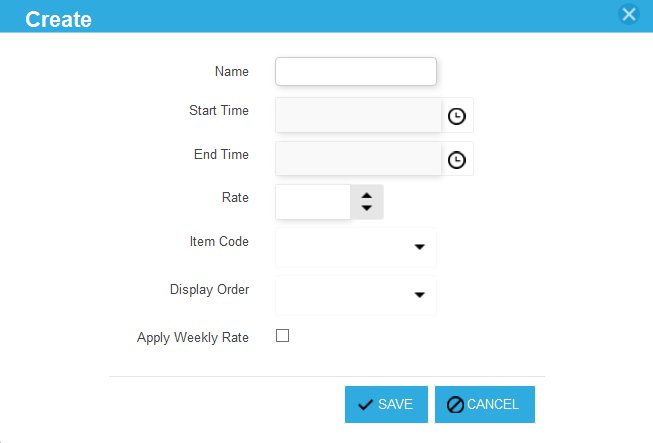
Create sessions by clicking on “Edit Sessions”. Go through and fill out the details for your relevant sessions. Examples of sessions include “Full Day” or “Half Day AM”. The Display Order chooses which column these sessions show to parents. It is advisable to put Full Day and Trip Day as display order 1 for parents to book in for the full week. If you want to offered a discounted weekly rate for when parents book in 5 sessions (most likely your main programme sessions) then tick the apply weekly rate option for the session.


Create Holiday Programme
Create a holiday programme by clicking “Add New Holiday Programme”. Enter the name and the weekly rate of the programme if you offer ones (please note under edit sessions you need to have ticked apply weekly rate). Select the Tracking Category Settings and if wanted choose to have all weekly rate sessions changed to a single session on the invoice by using the Replace sessions in weekly rate option.

Add in holiday programmes activities to holiday programmes created in the previous step by pressing the “Manage Activity” button.
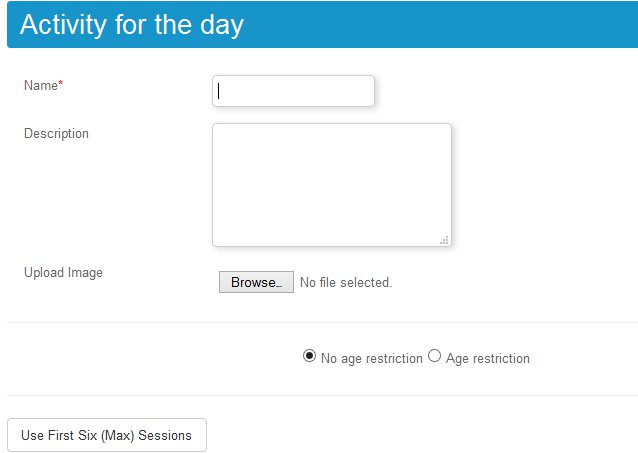
You can now add new activities by clicking on “Add New Activity”.


You can apply an age restriction to an activity to only have children between the age range you select able to book into the programme. If you choose no age restriction children for all ages can be booked into the activity. The age range for the activity is calculated on the date the activity is on. This means children that are booked in to the programme must be between the age range selected for that activity when the booking is made.

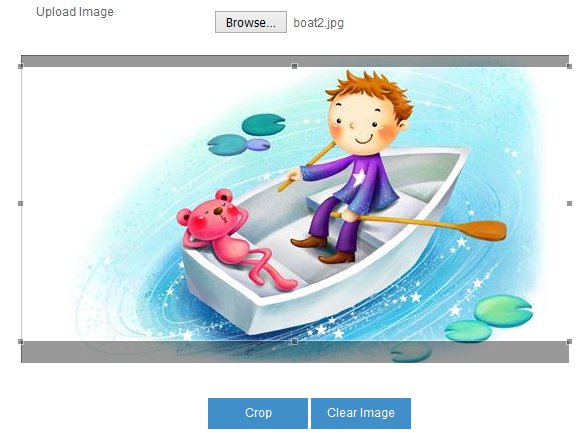
The crop tool will now appear on the picture, you can expand the tool until it is fully expanded in all directions.

Click "Crop" and the page will update with your image

Assign Holiday Programmes to Term Dates:
- Go to Tools > Term Planning
- Click on the "Manage Programme" beside the desired holiday term.
- If the holiday term is not yet created, click on the "Create New Term" button and create it
- If the term is not available under the create term button go to the head office level and got to Tools > term to create it for use at site level

- Select your Holiday Programme from the Add New Holiday Dropdown menu
- Click Schedule activity and make any changes if needed.


- Click "Make "Bookable" to make the Holiday Programme bookable for parents
- The Holiday programme will now appear green


Admin bookable only sessions for the holiday programme.
The holiday programme can be made admin bookable only so that only staff can make bookings for the holiday programmme.
Selecting the admin bookable option disables parent bookings but still allows admin staff bookings to be made for the holiday programme.
Related Articles
Creating Holiday Programme Flyer
To create a holiday flyer make sure your holiday programme is already set up here To create a holiday flyer follow the below steps Start by going to Tools > Holiday Programme flyer and click the create flyer button next to the holiday programme you ...Creating Term Programmes
To set up sessions that run during the term such as Before School care or after school care follow the below steps Go to Tools > Programme Library Click on "Add New Session" button Fill in all the details including name, description, times, ages and ...How do I change the cost of sessions on public holidays?
Do You Charge For Bookings On Public Holidays? aimy Plus has included defaults for certain public holidays, however, you can change them if you want. This is done by changing the settings for exclusion days, and can include days other than holidays ...Creating a booking link on your website
If you have a website or social media page you may want to link your aimy Plus portal there The URL (web address) parents will use to make bookings in your site is the same one you would have been given to you when you were given the login details to ...Booking Manager
The booking manager is where you can view pending bookings, confirm bookings, cancel bookings, edit bookings, The dropdowns at the top of the booking manager show site name, term and the ability to search bookings by parent or child. Information ...